Every time I see a big guy’s Github homepage is very cool, I always envy him. Those big guys are really amazing. Not only are they technically strong, but even their Github personal homepages are cool.
So I looked up information and finally decided to beautify my Github homepage (although I am a rookie and have not written any good open source projects…)
Create a new repository in your Github homepage. The repository name must be your GitHub username, for example, the following figure is rento666, and then add a README.md file. We just need to add the required information to this file.
As shown in the figure below, the option Add a README file is not checked. It is recommended to check it (checking it will save you the trouble of creating it manually). Click Create to complete the creation.
rento666/rento666 is a ✨special ✨ repository that you can use to add README.md to your GitHub profile. Make sure it is public and initialize it with README to get started.
Information when creating a repository
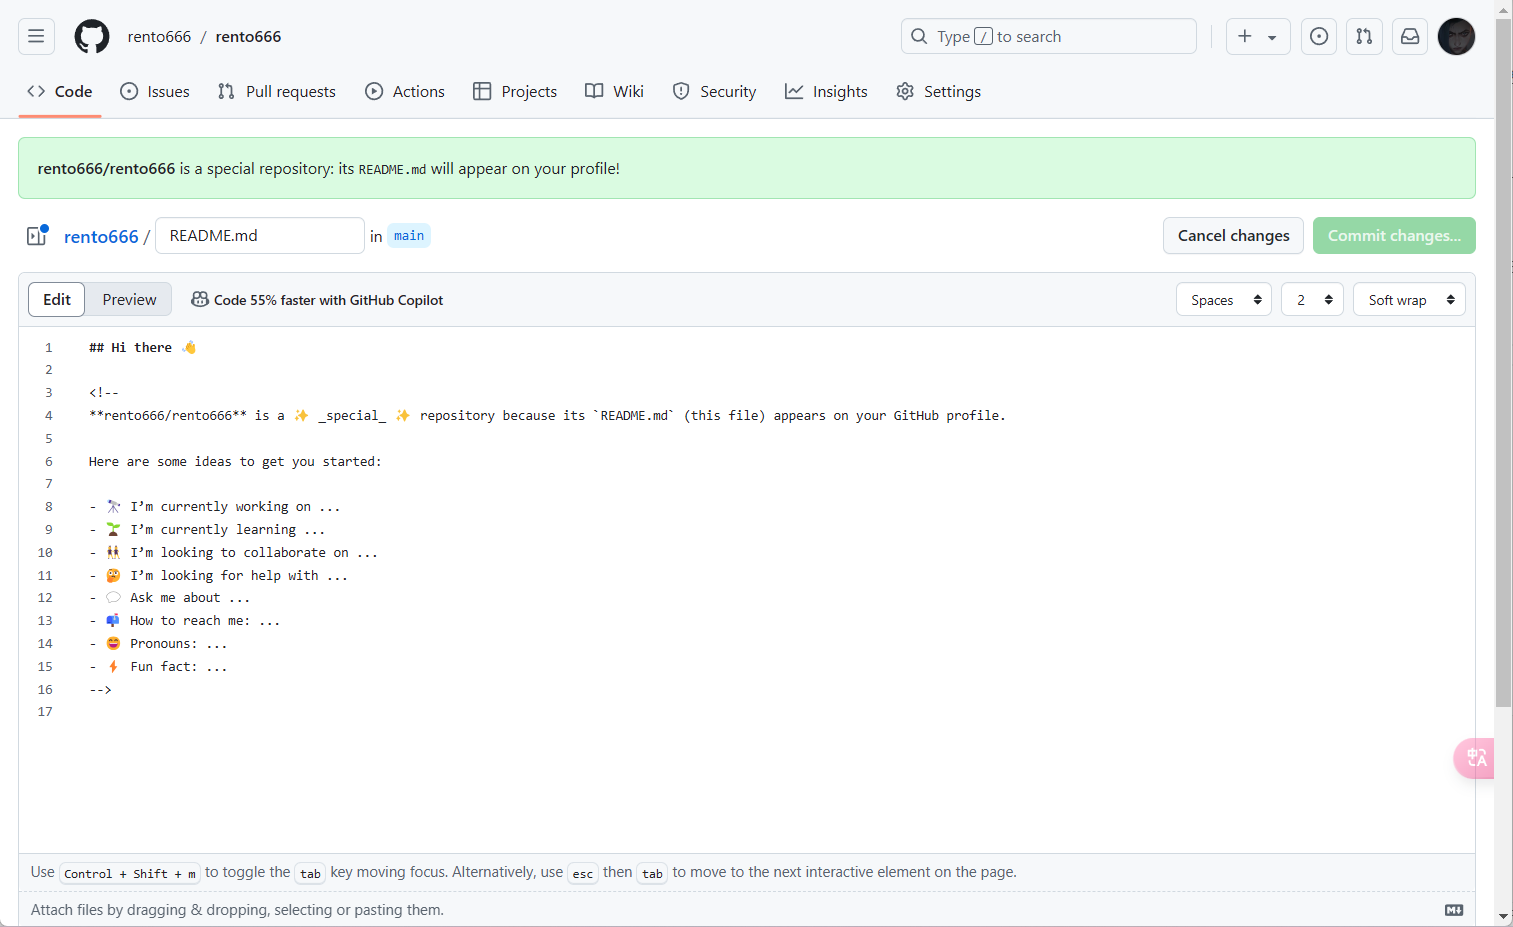
Edit README
Here is the interface for editing the README.md file:
Initial content of the README file
Started
The content that can be added to README can be your own introduction, open source projects, personal information, blogs, resumes, etc.
Markdown is highly extensible and supports HTML, Emoji, etc., so you can customize your own unique homepage~
However, human energy is limited, so we can fork the templates we think are good to our own warehouse, and then modify them to our own style.
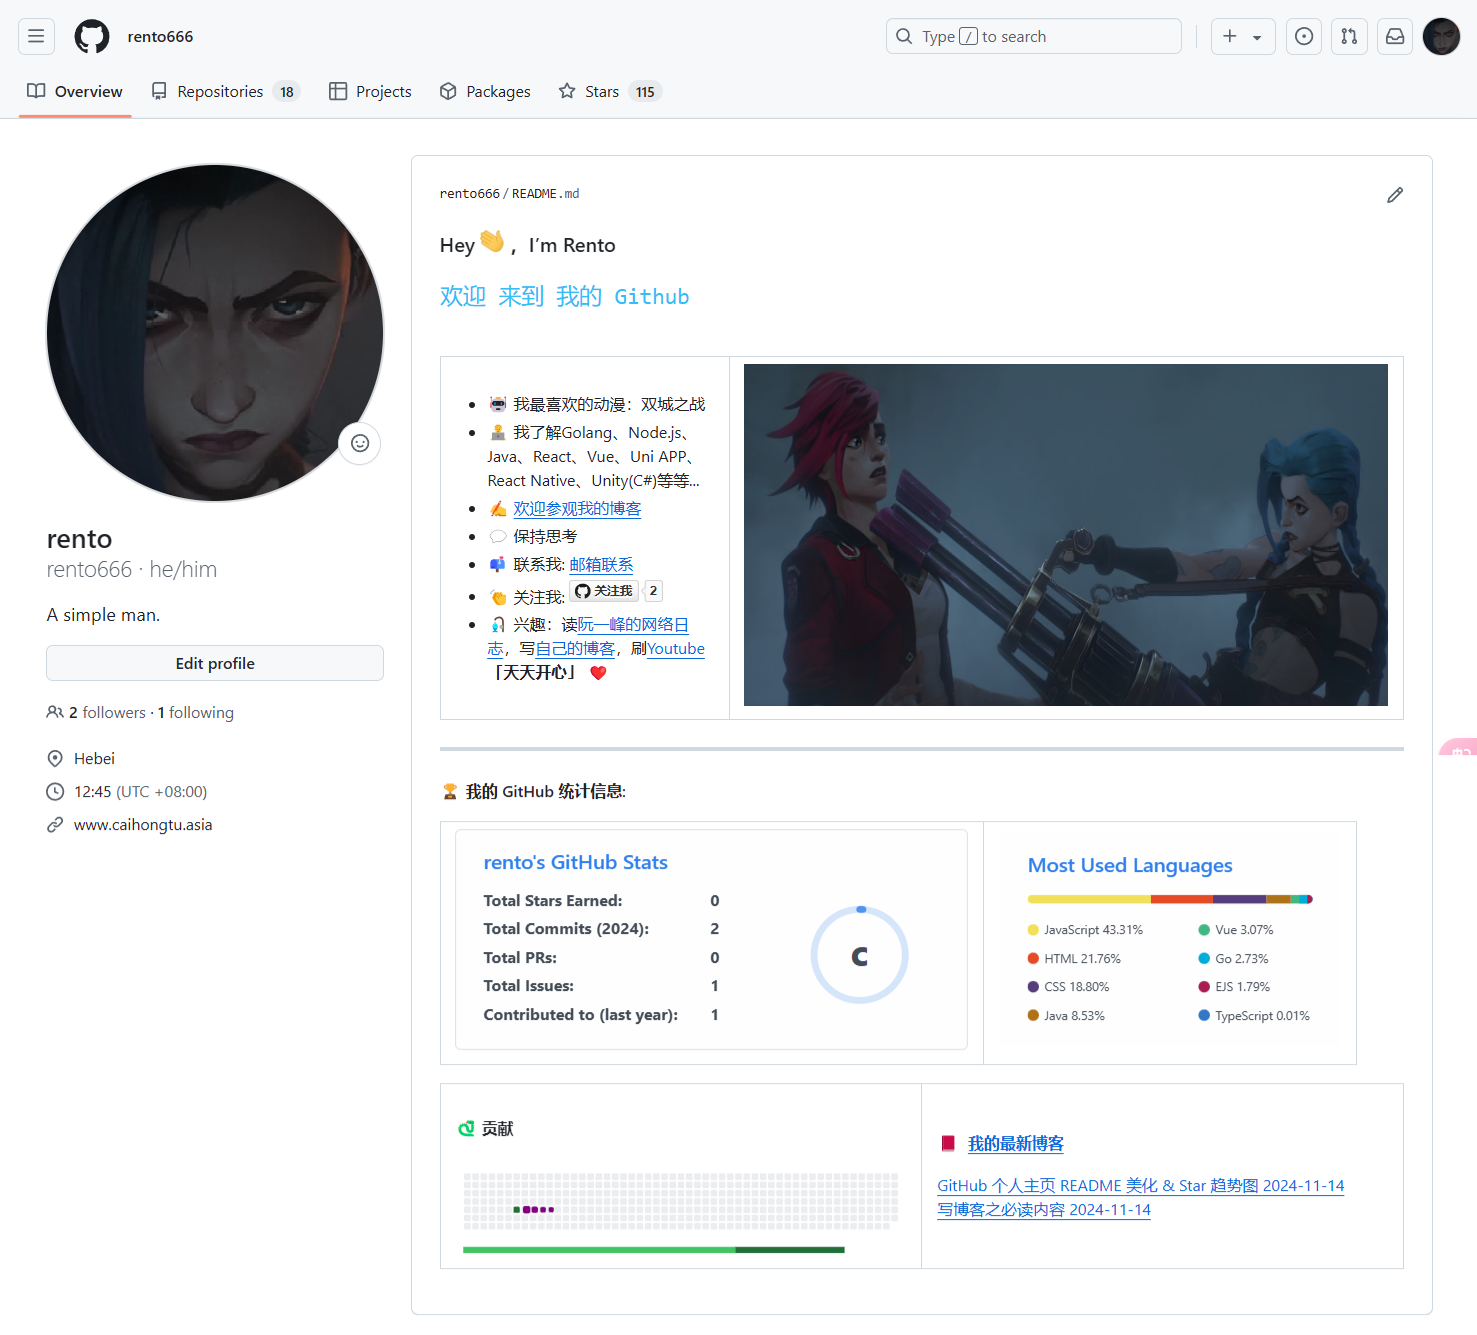
Because I like to watch the Battle of the Two Cities, I used pictures from the anime. The screenshot of the homepage is as follows (long screenshot, loading may be slow):
My Github homepage
Modification
In my homepage, I used the following template, you can copy it to your own README.md file:
The first step is to copy README:
README content is as follows
(Click to expand and collapse)
Step 2: After copying, press CTRL+F to replace the name, user name, hobbies, blog link and other information.
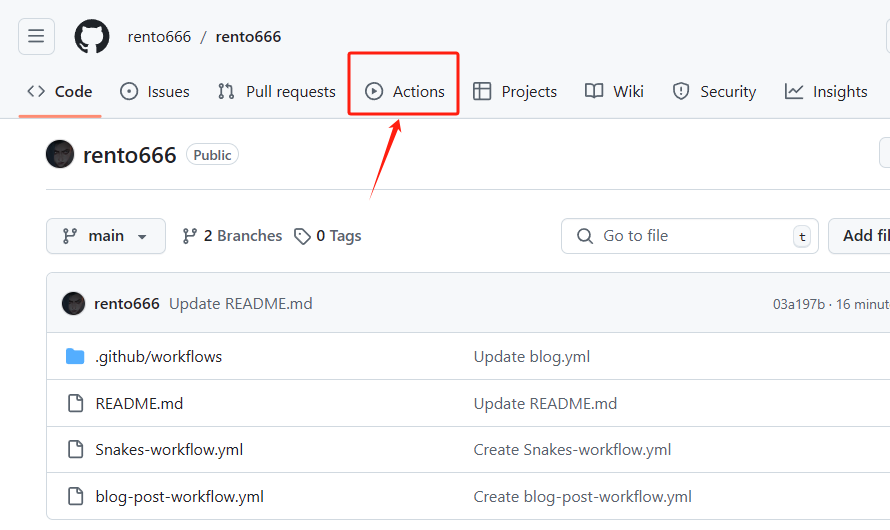
Step 3. After modifying README.md, click Actions in the repository to create a workflow, as shown below:
Click Actions to create a workflow
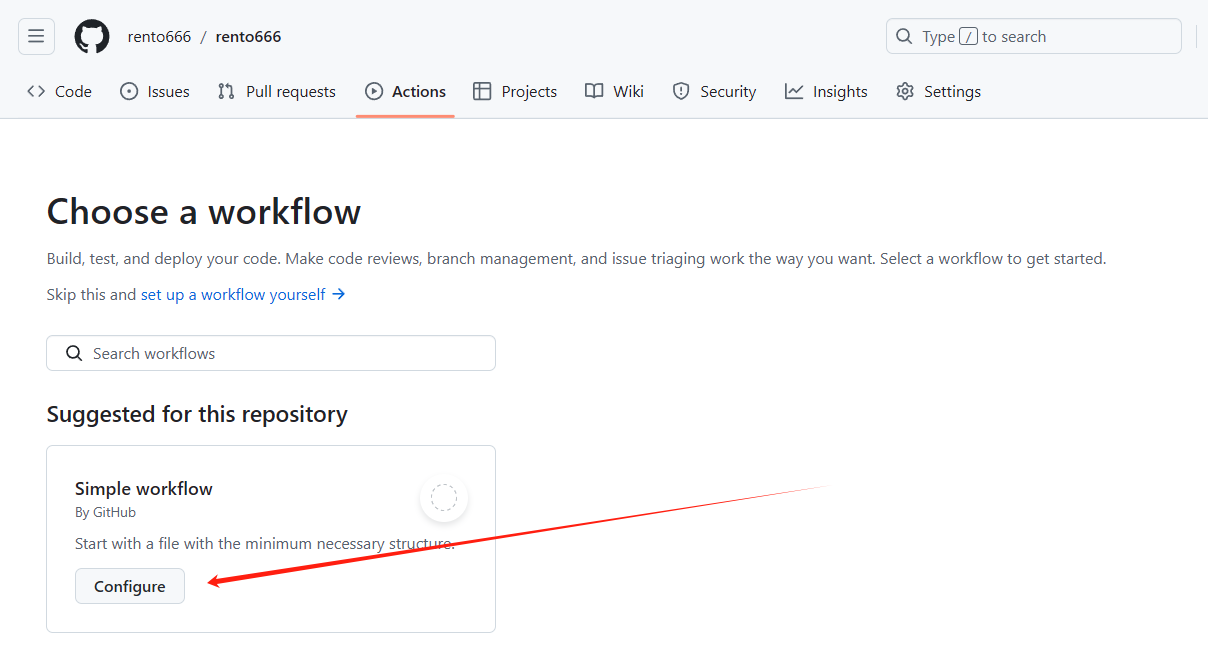
After entering, click Configure of Simple workflow, as shown below:
Click Configure
Add the following code (need to be separated, don’t put it in one file):
Greedy Snake workflow
(Click to expand and collapse)
 1
 2
 3
 4
 5
 6
 7
 8
 9
10
11
12
13
14
15
16
17
name: generate animation
on:
# run automatically every 2 hours
schedule:
- cron: "0 */2 * * *"
# allows to manually run the job at any time
workflow_dispatch:
# run on every push on the master branch push: branches: - master jobs: generate: permissions: contents: write runs-on: ubuntu-latest timeout-minutes: 5 steps: # generates a snake game from a github user (<github_user_name>) contributions graph, output a svg animation at <svg_out_path> - name: generate github-contribution-grid-snake.svg uses: Platane/snk/svg-only @v3 with: github_user_name: ${{ github.repository_owner }} outputs: | dist/github-contribution-grid-snake.svg dist/github-contribution-grid-snake-dark.svg?palette=github-dark # push the content of <build_dir> to a branch # the content will be available at https://raw.githubusercontent.com/<github_user>/<repository>/<target_branch>/<file> , or as github page - name: push github-contribution-grid-snake.svg to the output branch
uses: crazy-max/[email protected]with:
target_branch: output
build_dir: dist
env:
GITHUB_TOKEN: ${{ secrets.GITHUB_TOKEN }}
Please note that in the blog workflow below, you need to replace feed_list with your own blog RSS address. If you are also using Hugo and the theme is Stack, the RSS address should be https://your blog address/index.xml
Get the latest blog workflow
(Click to expand and collapse)
name: Latest blog post workflow
on:
schedule: # Run workflow automatically
- cron: '0 */2 * * *' # Runs every hour, on the hour
workflow_dispatch: # Run workflow manually (without waiting for the cron to be called), through the GitHub Actions Workflow page directly
permissions:
contents: write # To write the generated contents to the readme

jobs:
update-readme-with-blog:
name: Update this repo's README with latest blog posts
runs-on: ubuntu-latest
steps:
- name: Checkout
uses: actions/checkout@v3
- name: Pull in blog's posts
uses: gautamkrishnar/blog-post-workflow@v1
with:
feed_list: "https://cai-hong-tu-blog.pages.dev/index.xml"
template: "<div><a href=\"$url\">$title $date</a></div>"
date_format: "yyyy-mm-dd"
Star trend chart
In the README.md file in the root directory of your own open source project, add the following code:
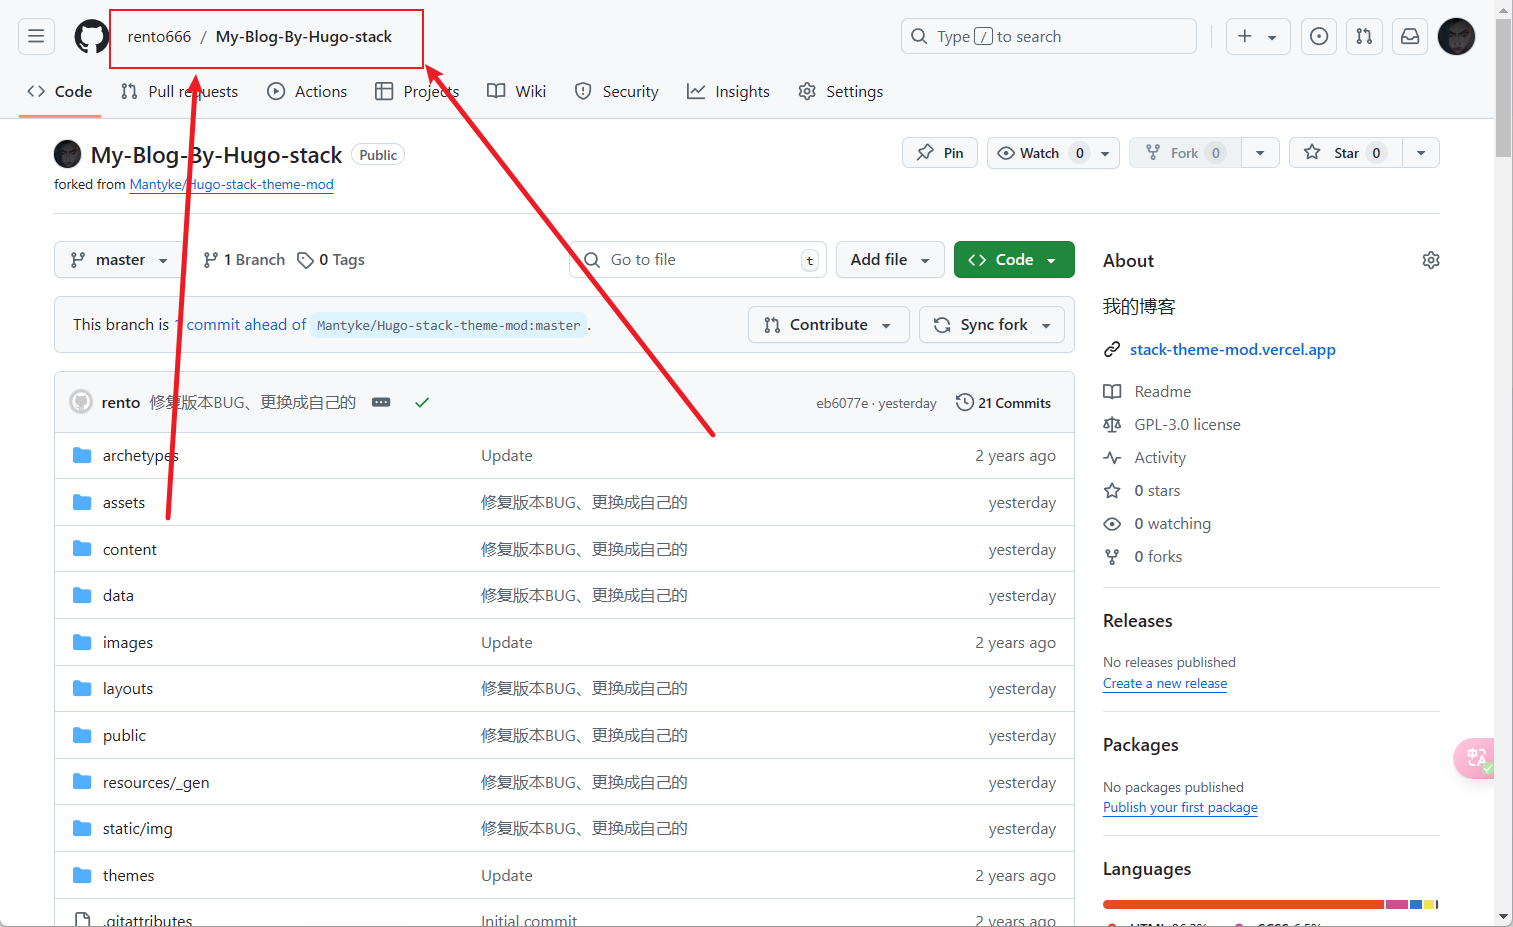
Among them, your own GitHub username needs to be replaced with your own Github username, for example, the figure below is rento666.
Open source project warehouse name needs to be replaced with your own open source project warehouse name, the figure below is My-Blog-By-Hugo-stack.
Star Trend Chart Code
(Click to expand and collapse)